Intro to Filipino Baking
Filipino baking is best defined by its traditional breads and pastries. From puto to pandesal, traditional Filipino breads have been a part of the Filipino culture for centuries. These delicious creations are an integral part of any traditional Filipino gathering or celebration. Whether it be a breakfast at home or a large family gathering, Filipino baking is enjoyed at every opportunity.
Let’s take a look at some of the traditional Filipino breads and pastries that have become staples in Filipino culture.
Pandesal
What is pandesal?
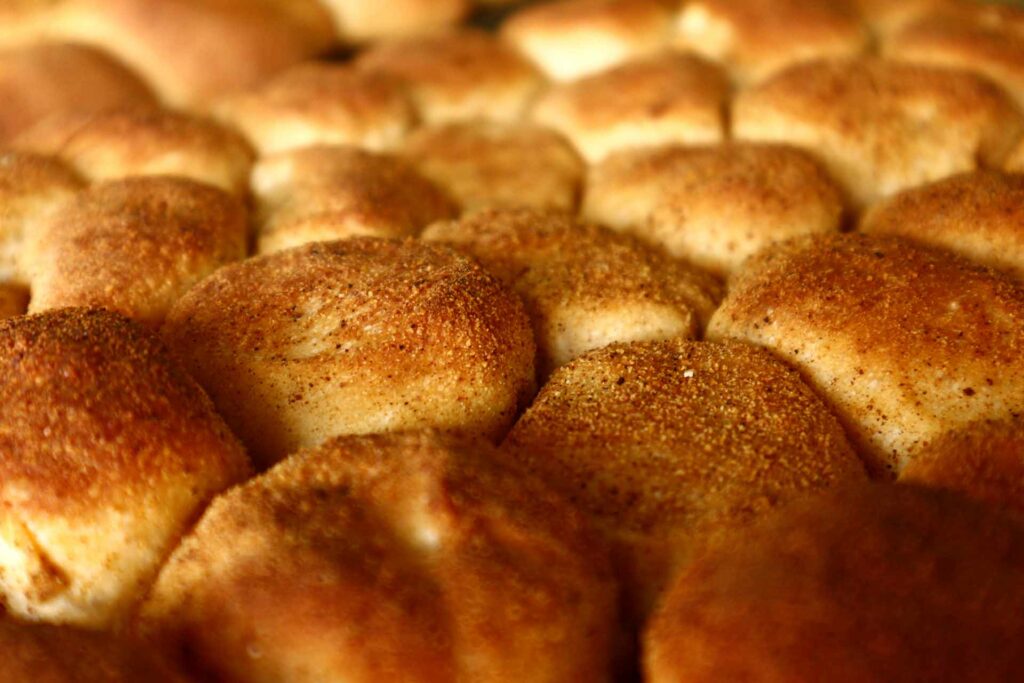
Pandesal is a traditional Filipino breakfast bread. It is usually made from wheat flour, yeast, and salt; however, pandesal can also be made with different flours such as rice or corn. Pandesal has a soft texture on the inside and is slightly crunchy on the outside due to its traditional form of baking in earthenware ovens. It is often served with butter, cheese, or jam and is the traditional Filipino breakfast bread of choice.
Pandesal Recipe
Ingredients
- 2 cups all purpose flour
- 2 cups bread flour
- 1/2 cup white sugar
- 5 tbsp butter melted
- 1 tsp baking powder
- 1 1/4 cup fresh milk warm
- 1 pouch rapid rise yeast
- 1 tsp salt
- 1 cup bread crumbs
- 1 piece raw egg
- 1 tbsp cooking oil
Instructions
- Mix the yeast, sugar and warm milk together until completely dissolved.
- Gently blend the flour, sugar, salt and baking powder in a mixing bowl until everything is evenly combined. Stir with a wooden spoon to ensure that all of the ingredients are thoroughly blended together.
- Gently incorporate the egg, butter, cooking oil and yeast-sugar-milk combination into the dry ingredients in a mixing bowl. Then bring it all together with your freshly washed hands until you form a cohesive dough.
- Knead the dough on a flat surface until it is perfectly smooth and fine. To expedite this process, you can utilize a stand mixer with an appropriate dough hook to make kneading simpler and faster.
- Knead the dough until it transforms into a round shape, and place it back in its mixing bowl. Cover the mixture with a damp cloth to let it rise for at least sixty minutes.
- Gently place the dough back onto a flat surface, then evenly divide it into 4 parts using an appropriate slicer.
- Gently roll each element until it takes the form of a tube.
- Slice the cylindrical dough diagonally; these slices will be the individual pieces of the pandesal.
- Carefully roll the thinly sliced dough over a bed of breadcrumbs, before transferring it to a wax paper-lined baking tray. Leave adequate spacing between each slice as they will expand while cooking.
- Allow the dough that has been sprinkled with breadcrumbs to rest in the pan for an additional 10-15 minutes as it continues to rise.
- Preheat the oven at 375°F (190°C).
- Place the tray of dough in the oven and bake until lusciously golden brown, roughly 15 minutes.
- Switch off the oven and take out your freshly made pandesal.
Ensaymada
What is ensaymada?
Ensaymada is a Filipino pastry that can be served as a snack or dessert. The traditional ensaymada is made with flour, butter, milk, eggs, sugar and cheese. It often has grated cheese or sugar (sometimes both) topping it. The dough is traditionally kneaded by hand, then shaped into a spiral, covered with butter and baked until golden brown.
Ensaymada Recipe
Want to learn how to make fluffy ensaymada? You’re in luck!

Ingredients
- 1 packet active dry yeast (2 ¼ teaspoons)
- ½ cup (100g) + 6 ½ teaspoons (25g) granulated sugar
- ½ cup lukewarm milk (around 105°F/40°C)
- 6 large egg yolks
- 3 cups (375g all-purpose flour
- 1 ½ teaspoons kosher salt
- ½ cup (1 stick/115g) unsalted butter, at room temperature + 4 tbsps (½ stick/55g), melted and slightly cooled
- Nonstick vegetable oil spray
- ½ cup (50g) grated Parmesan cheese, plus more for finishing
- ¼ cup (30g) sharp Cheddar, Microplaned or grated, for finishing
Instructions
Note: This recipe is from Filipinx by Angela Dimayuga & Ligaya Mishan.
- In the bowl of your stand mixer, combine together the yeast, a half teaspoon of sugar, and three tablespoonfuls (45 ml) of lukewarm water using a spoon. Cover the container with an absorbent kitchen towel for about 10 minutes until it begins to foam – this is confirmation that your active yeast has begun feeding on sugars and generating carbon dioxide.
- Thoroughly combine the milk, egg yolks, ¾ cup (95 g) of flour and ¼ cup (50g) sugar with the yeast mixture until you obtain a smooth texture. Subsequently cover it with a towel once more and let sit for an hour to one-and-a-half hours until it is bubbling vigorously.
- To the already-prepared mixture, blend in salt, the remaining egg yolks (3), ¼ cup (50 g) of sugar and 2 ¼ cups (380 g) of flour. With your stand mixer’s dough hook attachment ready for use, mix on medium low for 6 to 8 minutes until consistent and elastic. Gradually add room-temperature butter one tablespoon at a time while mixing each addition thoroughly before adding more – you’ll know it’s done when the texture is stretchable without any resistance!
- Cover the bowl with a towel and let the dough rise in a warm, sheltered spot for two hours until it doubles in size. If you are prepping your dough ahead of time (up to 12 hours before baking), cover it with plastic wrap and place it in the refrigerator. Two hours prior to baking take out from the refrigerator, still covered, and allow to reach room temperature so that when you bake later on it has doubled its original size.
- Preheat your oven to a steady 325°F (165°C). Utilize two 6-cup muffin pans and generously coat the cups with non-stick vegetable oil spray, followed by placing 4-inch (10 cm) parchment paper squares inside each cup.
- Knock down the dough and break it into 12 equal sections. Lift 1 piece and wrap the remaining pieces in a towel. Roll out this section of dough to create a 14 by 3-inch (37 by 7.5 cm) rectangle, then brush with melted butter, followed by 2 teaspoons of Parmesan cheese for flavour. Utilising a wooden dowel ½ lunch (12 mm) thick, roll up the rectangular slice around itself until it wraps all around the rod – make sure you’re doing so at an angle towards yourself! Carefully slide the dough off the dowel and onto a flat surface. Gently stretch the tube of dough to 8-10 inches in length, forming it into a coil that resembles a snail-shell shape. Place this coil inside one cup from your muffin tin.
- Take the remaining pieces of dough and fill all 12 muffin cups. Subsequently, cover your muffin pans with plastic wrap and allow the dough to rise for 25-35 minutes until it is puffy. To be certain that you are finished rising, do a baker’s poke test by gently pressing on the pan; if it springs back then you know that you’re done!
- Bake these delightful ensaymadas for an approximate 20-25 minutes or until golden brown on top and slightly domed. Once you take them out of the oven, brush with the leftover melted butter and sprinkle with a generous amount of sugar, Parmesan cheese, as well as Cheddar cheese.
Pan de Coco
What is Pan de Coco?
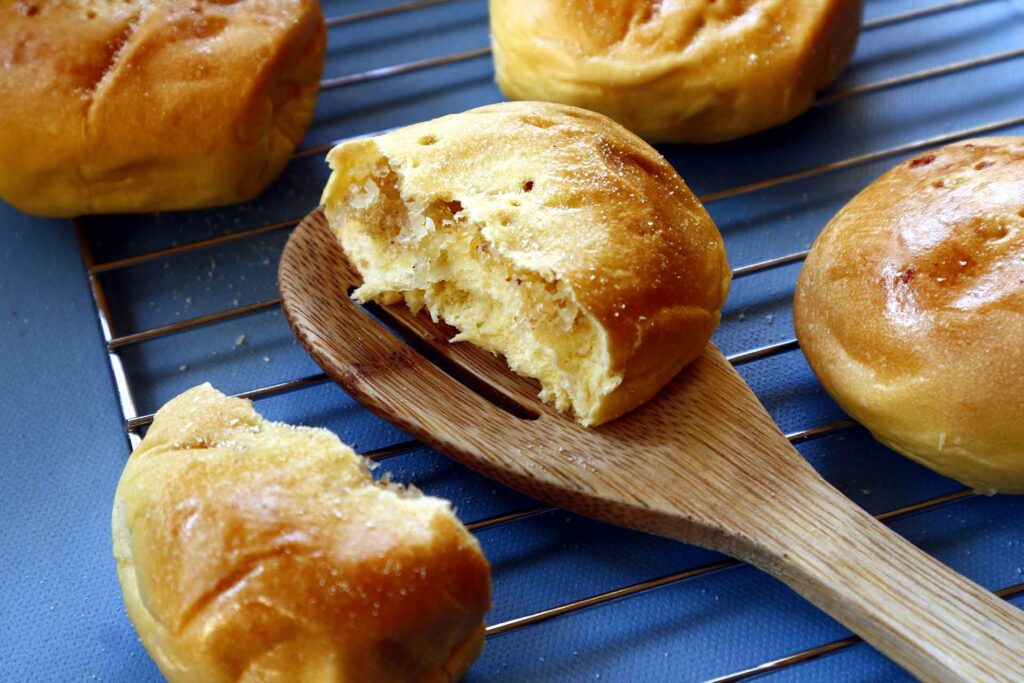
Pan de Coco is a traditional Filipino bread made with fresh grated coconut meat and sugar, rolled into a ball and pan-fried until golden brown. This sweet savory snack is often eaten as an accompaniment to meals or enjoyed as a quick bite in between activities. Pan de Coco has been around for centuries and remains popular amongst the locals in the Philippines.
Pan de Coco Recipe
Bread Ingredients
- 1 tablespoon yeast
- ¼ cup lukewarm water
- 1 teaspoon salt
- ½ cup sugar
- ½ cup milk
- ¼ cup melted shortening
- 2 large eggs
- 3 ½ cups All-Purpose Flour
Filling Ingredients
- 2 cups fresh grated coconut meat
- 1 cup brown sugar
- 1 teaspoon vanilla extract
Instructions
- Preheat your oven to 375°F (190°C).
- Soak the yeast in lukewarm water for five minutes, or until foamy/frothy.
- In a large bowl, whisk together salt, sugar, milk, shortening, and eggs until completely blended. Gently stir in 1 ½ cups of flour with the yeast mixture until evenly incorporated. Mix all ingredients thoroughly for optimal flavor and consistency.
- Gradually blend in the remaining 1 and a half cups of flour until the dough leaves the sides of your bowl. Keep some flour on hand to dust your hands with, as well as your work area. Knead firmly until you have achieved an even smoothness and elasticity. Place this kneaded dough into a greased mixing bowl; then cover it with a damp cloth and let rise for one hour or double its size.
- Firmly knead the dough and portion it off into 30-gram balls. Carefully shape each ball with your hands until they’re perfectly round.
- In a small bowl, mix together the ingredients for the filling.
- Gently flatten each ball of dough, then add 1 tablespoon of your preferred filling; securely pinch the edges together to enclose the contents. Using a rolling pin, roll out each piece until it takes on its traditional pan de coco shape.
- Set the dough on parchment-lined baking sheets and leave to rise until it doubles in size, typically between 25 to 30 minutes. Create small holes or dents on top of the loaf before popping them into the oven; this allows steam to escape as they bake.
- Glaze the crust of your bread with an egg wash for a glossy finish.
- Bake for 15-20 minutes until the top is golden brown. Serve warm.
Puto Bumbong

What is puto bumbong?
Puto bumbong is a traditional Filipino dessert made from purple yam or “ube” and steamed in a special bamboo tube called a “bumbong”. This delicacy is traditionally served during the Christmas season but can be enjoyed all year round. Puto bumbong is typically topped with shredded coconut, cheese, and butter.
Puto Bumbong Recipe
Puto Bumbong Ingredients
- 1 cup glutinous rice
- 2 tsp purple food color (ube)
- 2 cups water
Topping Ingredients
- Muscovado sugar (can be substituted with regular white sugar)
- Margarine
- Grated coconut or grated Parmesan cheese
Instructions
- Transform ordinary glutinous rice into extraordinary galapong by soaking it in water overnight—treat yourself to a delicious, chewy sweet treat!
- For a finer consistency, grind the soaked rice in a large mortar and pestle. Or if you would like to save time, using a blender is an excellent alternative.
- As the glutinous rice is being grounded, add in food coloring to combine.
- Cover the glutinous rice with a fine muslin cloth and keep it in a strainer to let go of any extra moisture.
- After allowing the ground rice to dry for a short period, simply run it through a strainer with an appropriate mesh size to create coarse-grained rice flour. The rice flour for making puto bumbong is now ready to be cooked.
- Carefully scoop teaspoonfuls of glutinous rice powder into each bamboo tube (bumbong), or, if you prefer a more tactile approach–use your bare hands.
- Set each bamboo tune into the steamer. Make sure to preheat the steamer, and the water is already boiling.
- Gently steam the Puto in bamboo tubes for 10 minutes.
- Gently take out each cooked Puto from the bumbong and give it a gentle shake by tapping its bottom upside down on top of a pre-prepared wilted banana leaf. If the dough is too vigorously sticking to your hands or equipment, you can use a skewer or knife to help it slide off steadily.
- For a delightful finishing touch, spread some margarine over the dish and sprinkle it generously with sugar. Then, top off your creation with grated coconut or Parmesan cheese for an extra special flavor combination! Enjoy this tantalizing treat hot out of the oven – you won’t regret it!
Sapin-Sapin
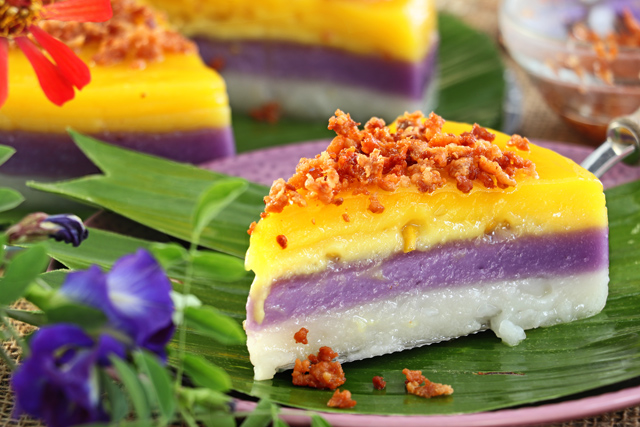
Image Source: Foxy Folksy
What is sapin-sapin?
Sapin-sapin is a traditional Filipino multi-layered steamed cake made from glutinous rice flour, coconut milk, and sugar. It is usually topped with latik or toasted grated coconut mixed with brown sugar syrup. Sapin-sapin has a unique flavor and texture which makes it one of the most popular traditional desserts in the Philippines.
Sapin-Sapin Recipe
Ingredients
- 3 cups glutinous rice flour
- 1 can 305ml condense milk
- 2 ½ cups coconut milk
- ¾ cups granulated sugar
- ¼ tsp salt
- 1 tsp ube flavoring
- 1 ½ tsp langka flavoring
- ½ tbsp vegetable oil
Coconut Curd Instructions
- Bring a saucepan to medium heat and pour in the coconut milk. Stir intermittently until it reaches boiling point, then let it simmer until its consistency starts to thicken.
- Bring the heat down to a simmer and stir frequently. Make sure to scrape the sides and bottom of the pan constantly so that nothing sticks or burns. The curd will soon begin forming solids, and as it cooks further these solids become golden brown in hue – when they do, carefully transfer them into a bowl.
Sapin-Sapin Instructions
- Before beginning, coat the inner sides and base of an 8 ½ inch round cake tin with oil. Then prepare a steamer by heating water on low heat.
- In a large bowl, mix together the glutinous rice flour, coconut milk, and condensed milk until it is silky smooth. Next, stir in your desired amount of sugar and salt until dissolved within the batter. Finally, give one last stir to ensure that everything is fully integrated.
- Separate the batter into three bowls in equal portions.
- Take one bowl and mix Ube extract with Ube halaya until achieving a consistent color. In another bowl, incorporate the Langka extract and stir until it is uniform in hue. Leave the remaining portion untouched.
- Carefully pour the tantalizing ube-flavored batter into your prepped baking pan. Allow it to steam for a period of 30 minutes or until its solidified, testing with a toothpick and confirming that it comes out clean when inserted.
- Slowly pour the langka-flavored mixture over the ube layer. Then, steam for around 30 minutes or until a toothpick inserted in it comes out clean.
- Gently pour the plain batter over the purple layer, then steam for approximately 30 minutes or until a toothpick inserted comes out clean. Finally, remove it from the steamer and let cool completely.
- Carefully run a knife around the edges of the foil pan to easily remove your cake. Place a wide, flat platter over the top and flip it upside-down. If needed, give a few taps on the sides of your pan to successfully transfer your sapin-sapin onto its service plate, then finish off with some delicious latik! And you’re all set – easy as that!
Final Thoughts
These are just 5 of our favorite traditional Filipino breads, but there’s plenty more to explore when you visit the Philippines! From traditional doughnuts to traditional pandesal and more, these scrumptious treats are guaranteed to satisfy your sweet tooth. So why not give them a try soon? You won’t regret it. Bon appetit!